Managing Script Options
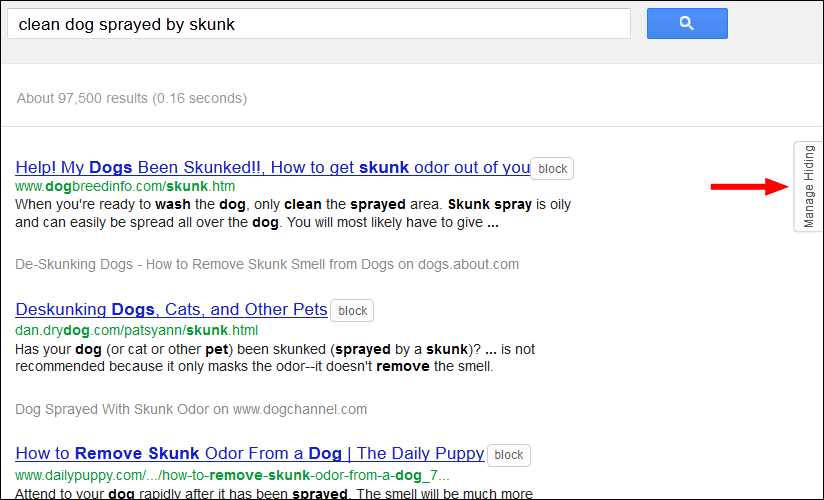
To change script options, look for and click the Manage Hiding button on the right edge of the search results page (or if you moved it, to the right top or right bottom of the page), or use the Manage Hiding button in the Block pane.
Managing Blocked Hit Notices
Perhaps you do not want to know when results are being hidden. There's a checkbox for that in the Block pane, and also in the management pane. Here's how it looks with notices displayed (default):
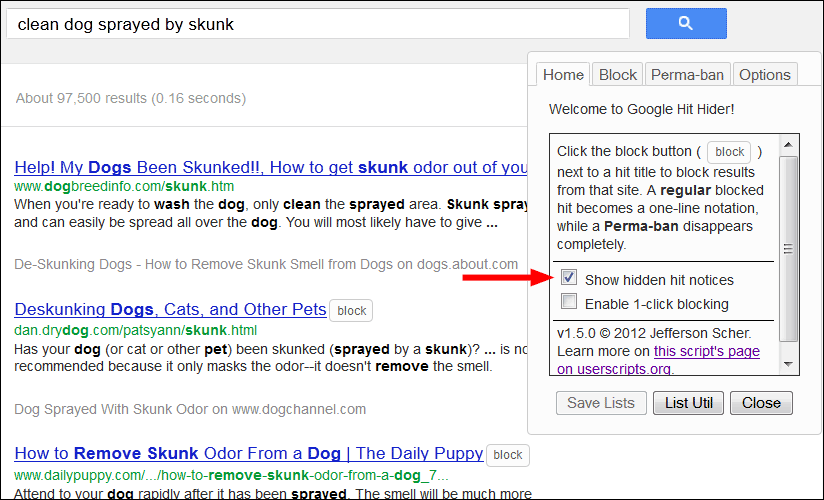
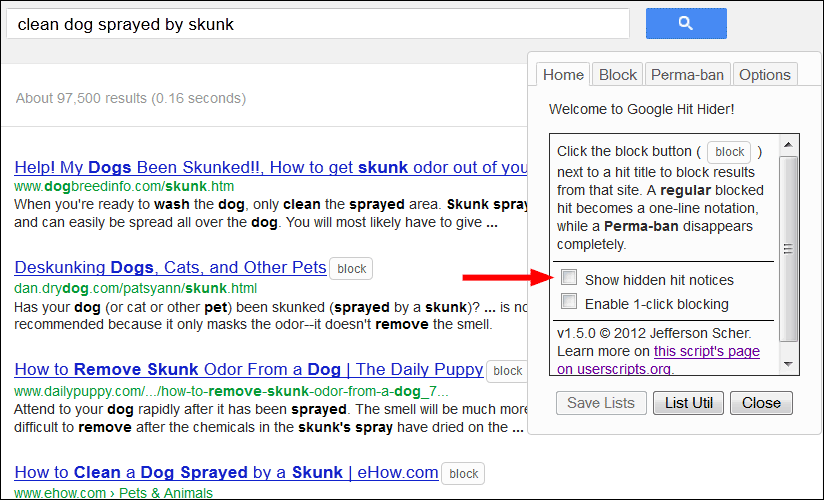
Clearing (unchecking) the Show notices checkbox removes the suppressed hit notices. The pane stays open while the results are updated so you continue to manage the script. Here's the difference:
Blocking Options
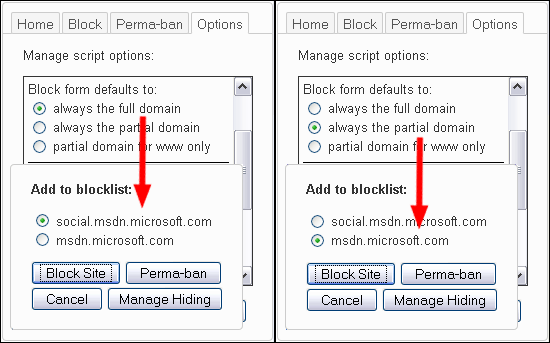
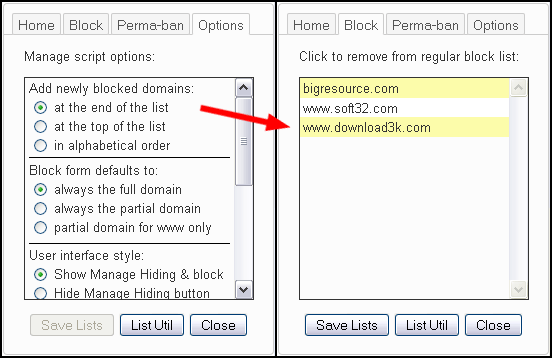
By default, the Block pane will pre-select the full domain. You can choose a different domain by hand, or, if you are an aggressive blocker and want to block as much as possible from a site, you may want to have the script pre-select the partial domain. Here's where you do that:
New domains are added to the end of the block list for easy reference. You can change this so they are added at the top, or the list is kept in alphabetical order. Here's where you do that:
Configuring One-Click Blocking
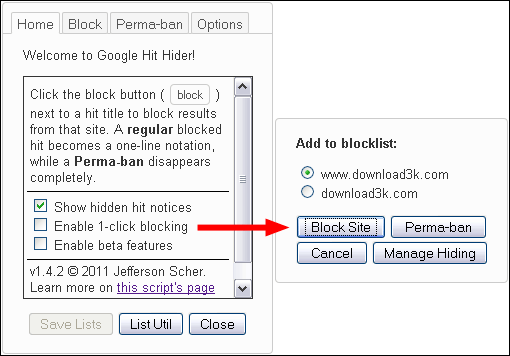
Once you are familiar with the block form, it could get a bit monotonous clicking the block button, then clicking Block Site or Perma-ban. You can use the one-click blocking feature to skip that second step.
To add a site to your regular block list with a single click, visit the Home tab of the Management Pane and check the box to "Enable 1-click blocking." The script will automatically click the "Block Site" button for you. Or you can use the checkbox in the Block pane.
If you prefer to automatically add the domain to your Perma-ban list, visit the Options tab of the Management Pane and check the box for "1-click to Perma-ban list". (You still need to enable one-click blocking on the Home tab as well.)
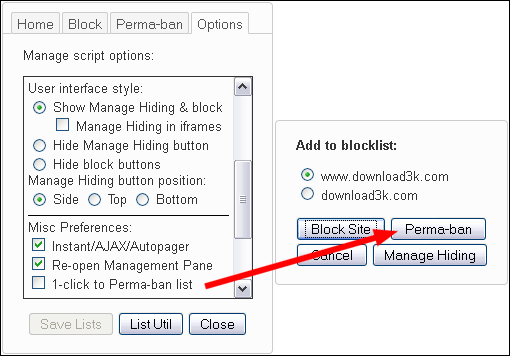
Finally, if you find yourself routinely choosing the second domain in the block form (the more aggressive one that blocks various subdomains), you can set that as your default. Visit the Options tab of the Management Pane and choose the radio button that matches your level of aggressiveness.
Q: Can I call up the block dialog to choose a non-default option?
A: Yes, hold the Shift key when clicking the block button to display the block dialog.
Q: If I hid the Manage Hiding button that usually appears on the right edge of the window, and I turn on one-click blocking, how can I open the Management Pane?
A: Hold the Shift key when clicking the block button. You also can use the Greasemonkey monkey menu button > User Script Commands > Manage Hiding, or the similar Tampermonkey button.
Q: Is there any way to undo the last block?
A: Currently, it's a manual process. You need to open the Management Pane, find the domain on the regular or Perma-ban list, and remove it there. If you are interested in a one-click "Undo Last" button, let me know by starting a discussion (on Greasy Fork) or opening an issue (on OpenUserJS.org).
Moving, Hiding, and Editing Buttons
If there are too many buttons for you, you can: remove the Manage Hiding button (call up the management pane by clicking any block button) or remove the block buttons (they will display when you open the management pane). You also can have the block buttons appear only when you mouse over a hit. Here's where you set that:

If you prefer to change the text on the block button from "block" to something else, maybe "X" or "bye", you can edit that caption. Here's where you do that:

Custom Style Rules
If you want to modify the appearance of the block notices or buttons more extensively, you can use custom style rules. This requires some knowledge of (or perseverence in learning) CSS, the language of web page styles.
To add custom style rules, scroll to the bottom of the Options tab in the Manage Hiding dialog and click the Edit Custom Style Rules button. A form should open along the bottom of the browser. You can experiment and use the Test button to apply your changes to the page without clearing your saved settings. Use Save once you are confident that your rules are working.
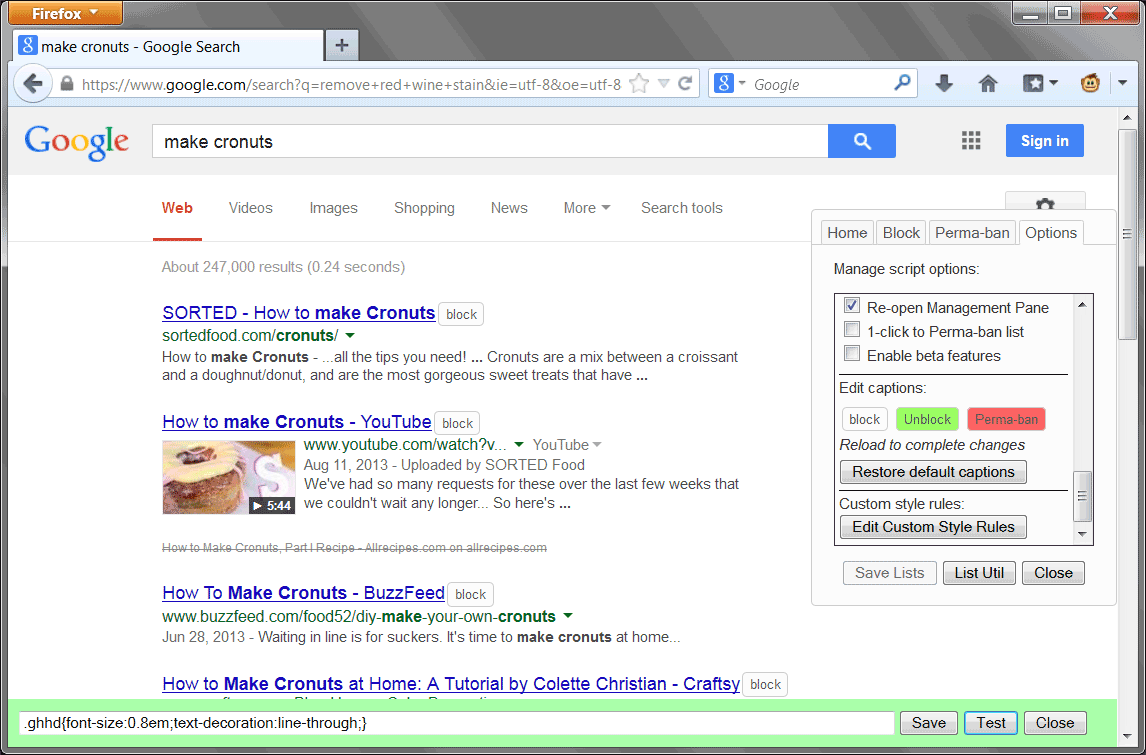
The rule in the above example, which reduces the text size of the block notice and draws a line through it, is:
.ghhd{font-size:0.8em;text-decoration:line-through;}
You can use your browser's Inspect Element feature to learn the selectors needed to create custom style rules, or start a discussion (on Greasy Fork) or open an issue (on OpenUserJS.org) for help.